
Written by

Published
Quickdraws connect your climbing rope to a bolt or piece of protection. Choose draws that you can clip reliably, then match their length to the route’s bolt line and your route plan. If you are learning to lead climb, pair that practice with a properly fitted climbing harness.
What is a quickdraw?
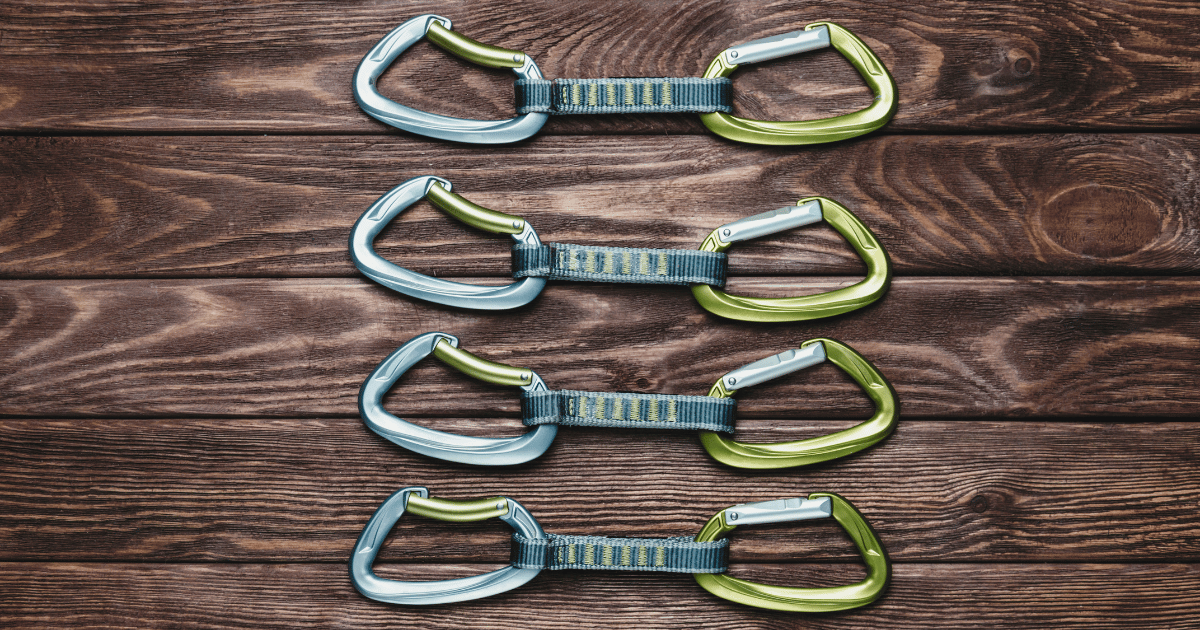
A quickdraw is two nonlocking carabiners joined by a short sewn sling, often called a dogbone. One carabiner clips the bolt hanger or protection; the other clips the rope. The sling keeps those two connection points apart, which helps the rope run more cleanly and makes clipping more manageable.

The two ends do different jobs. Keep the rope-end and bolt-end carabiners in their intended positions if the draw uses a retainer on the rope end. Petzl’s technical guidance describes a fixed rope-end carabiner and mobile anchor-end carabiner; putting retainers on both ends can make the assembly too rigid.
The three parts that affect how a quickdraw handles
The carabiners and sling work as one unit, but each part changes how the draw feels on a route.
Bolt-end carabiner
The bolt-end carabiner clips the hanger. A straight gate is common here because it is easy to push against a hanger and remove while cleaning a route. It should be able to hang and align freely rather than being fixed in place by the sling retainer.

Rope-end carabiner
The rope-end carabiner receives the rope, usually through a bent gate. The bend gives the rope a clearer target when you’re clipping from an awkward position. A rubber or molded retainer helps keep this carabiner oriented for clipping.

Sling or dogbone
The sling connects the carabiners and provides the draw’s length. Wider, stiffer dogbones are usually easier to grab and handle on sport routes. Narrower, lighter slings reduce rack weight but can be less pleasant when you are fighting for a clip. Check the manufacturer’s instructions for the materials and inspection requirements for your specific draw.

Which quickdraws should you choose?
Choose the draw for the route’s length, direction changes, and the kind of clipping you expect. A standard-length sport draw works on many straight bolt lines; use a longer draw only where it improves the rope path without introducing a new hazard.
| Route or use | Useful starting choice | Why |
|---|---|---|
| Straight sport routes | Standard-length draws that you can clip comfortably | Straightforward rope path |
| Routes with offsets or a small roof | Add 17 cm or 25 cm draws | Lets the rope run with fewer sharp bends |
| Multipitch, trad, or wandering lines | Add alpine draws | A longer sling can stay doubled or be extended |
| Long approaches and weight-sensitive routes | Lighter wire-gate draws | Reduces carried weight; choose a size you can clip confidently |
Sport climbing quickdraws
Sport draws favor clipping comfort and durability. A stable rope-end retainer and a dogbone you can handle confidently can make clipping easier when you are learning or working a route. Petzl’s DJINN AXESS, for example, is available in 12, 17, and 25 cm lengths, illustrating how length is used to manage rope drag rather than as a measure of difficulty.
Wire gates, solid gates, and keylock noses
Wire-gate and solid-gate carabiners describe gate construction, not carabiner size. A bent-gate rope-end carabiner can use either style. Neither gate type replaces good positioning, so choose a draw you can operate reliably with the rope and terrain you climb most often.
A keylock nose is designed to avoid snagging on a bolt hanger, rope, or gear loop. It can make clipping and cleaning less fussy, especially with larger carabiners. It is a handling feature, not a reason to ignore gate position or cross-loading.
How long should quickdraws be?
There is no universal quickdraw length. The Petzl DJINN AXESS is offered in 12, 17, and 25 cm versions; on a straight line, choose the length that keeps the rope path simple, then add length only where a bend in the route calls for it.

Longer is not automatically better. Extra length adds bulk and can make a draw sit awkwardly on a straight line. Use it where it removes a meaningful bend in the rope path.
How many quickdraws do you need?
For a single-pitch sport route, count the bolts and plan the rack before leaving the ground. Bring the number and lengths the route requires, plus only the equipment your intended anchor or descent system calls for.
This is route planning, not a universal rack number. Check a current guidebook, route information, or a partner who knows the climb; do not assume a nonlocking quickdraw is appropriate for every anchor or lower-off.
How to clip a quickdraw safely
Clip the bolt end first, then put the rope through the lower carabiner in the orientation shown in Petzl’s clipping guidance. Before moving on, compare the rope path with the diagram rather than relying on the gate direction alone.

-
Clip the anchor-end carabiner to the bolt hanger and let the draw hang freely.
-
Check that the sling is not twisted and the rope-end carabiner is presented for clipping.
-
Pull up only the slack you need, stabilize the lower carabiner, and press the rope through the gate.
-
Look once at the rope path before climbing above the draw.
Petzl warns that an incorrectly positioned draw or rope can allow the rope to unclip through rope movement or a carabiner flipping on the bolt during a fall. Learn the motion on easy terrain and get in-person instruction before relying on it when the clip is consequential.
Back-clipping and rope drag
A back-clip puts the rope through the lower carabiner in the wrong direction. If the rope path does not match the Petzl diagram, stop and re-clip before climbing higher. The visual check takes a moment and is easier than trying to correct the clip after you have moved away from it.
Rope drag comes from repeated bends in the rope path. Put a longer draw at the bolt creating the bend, rather than lengthening every draw on the route. On a wandering line, alpine draws give you more range to keep the rope closer to a straight path. Near the ground or a ledge, extension can also increase fall distance, so assess that consequence before lengthening a draw.
Quickdraws, alpine draws, and loose slings
Use standard quickdraws on straight bolt lines, alpine draws where extension changes the rope path, and loose slings for tasks such as extending protection or building an anchor. A loose sling needs appropriate carabiners and a setup suited to the placement; it is not simply an interchangeable quickdraw.
| Item | Best use | Main tradeoff |
|---|---|---|
| Standard quickdraw | Straight sport bolts | Fixed length |
| Alpine draw | Wandering routes and multipitch climbs | More bulk to manage |
| Loose sling | Extending protection and anchor work | Requires separate connectors and judgment |
Inspect quickdraws before climbing
Inspect carabiners, gates, the sling, and the retainer before use. Follow the retirement criteria for the specific product, including after an exceptional event or when inspection identifies damage. Petzl’s instructions call for checking carabiner frames, gates, and hinges for cracks, deformation, and corrosion; gate closure; sling stitching; cuts; wear; and correct assembly.

Do not treat a fixed draw at the crag as inspected equipment. Look at the sling, carabiners, gate action, and the bolt before you depend on it. If anything is questionable, choose another option and ask a qualified local source about the hardware.
A simple first rack
Build a rack from the routes you plan to climb, starting with draws you can clip and inspect confidently. Practice clipping on routes comfortably below your limit, where you can pause and check the rope path. More advanced route planning and body position will make that practice easier; see our guide to rock climbing technique.
Frequently asked questions
Are quickdraws for trad climbing different from sport draws?
They can be. Trad climbers often carry a mix of lightweight draws and extendable alpine draws because protection placements and rope paths vary more than on a straight sport route.
Do I need a longer quickdraw for every route?
No. Use longer draws where the rope would otherwise make a sharp bend, after considering the fall consequences at that position.
What certification should I look for?
Check the manufacturer’s documentation for the complete assembly and its components. UIAA 121 and EN 12275 cover climbing connectors; the UIAA identifies Type T as a directional connector for quickdraws.
When should I replace a quickdraw?
Replace it when the manufacturer’s retirement criteria apply or an inspection finds damage, deformation, corrosion that affects function, compromised stitching, cuts, or gate problems. Follow the product instructions for the complete retirement criteria and service-life limits.
Sources
- Petzl: positioning the quickdraw and clipping the rope
- Petzl quickdraw instructions
- UIAA 121 connectors overview

About the author
Luc Gonzales
Luc Gonzales is the founder of Cliff Culture and a perpetual bouldering enthusiast who helps climbers make practical, clear-eyed gear decisions.